What Can You Get From a Dental Cleaning

people who have not had their teeth cleaned in a long while may expect to experience a longer cleaning, and some extra pulling or scraping to remove plaque from teeth. For most people, however, a dental cleaning is more inconvenient than painful.
People usually don’t need pain medication for a dental cleaning. Some patients are made so nervous by dentists that they may ask for nitrous oxide though. Alternately, a patient might take a tranquilizer about an hour before the appointment to help with anxiety. In cases of extreme anxiety, some dentists use a method called sleeping dentistry, where a patient can be medicated and essentially sleep through a procedure.

Dental cleanings often conclude with advice about how to care for teeth at home, and scheduling any appointments needed for more extensive services, like filling cavities. People with busy dentists should schedule their next cleanings well in advance, so as to keep regular six-month cleaning appointments.

Most dental cleanings take between 30 minutes and an hour. If the cleaning is part of a yearly check-up, the dentist may also take X-rays by dental x-ray machine to check for cavities. A dental hygienist usually performs most of the cleaning. The dentist will normally take a last look, and perhaps perform some difficult plaque removal toward the end of the cleaning, as well as evaluate the gums for gum disease.

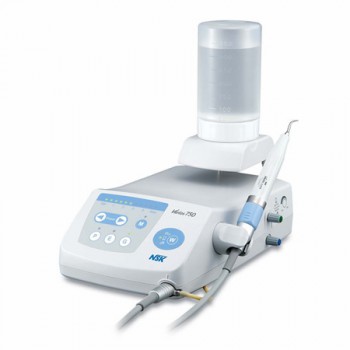
Dental hygienists generally use several tools during a dental cleaning, including a tooth polisher and a dental scaler. Tooth polishers buff teeth and eliminate tiny pieces of plaque. They generally have several different sized heads for cleaning hard to reach places. Scalers look a bit like metal hooks and are used to remove hard plaque, especially between teeth. Some people find the use of a scaler uncomfortable, depending on their sensitivity level, pain threshold, the length of time since the last cleaning, and the extent of plaque build-up.

Dentists may also employ a device that shoots water into the mouth, so the person can rinse out plaque several times during the cleaning. In some cases, a dentist may merely use mouthwash for this purpose.
The Importance of Dental Curing Lights

A light-curing device is now commonly found in dental practices across the country. Some assume that a “point and shoot” technique is sufficient. However, in order to achieve optimal results, dental curing lights must be used correctly. Read on to find out more about how to use a dental curing light so that the resin-based restorations you place in patients’ mouths will be as successful as manufacturers’ claims.

Recently, a new concept to dentistry, the LED, has entered the market. There have been significant sales promotions from the several companies selling LED lights. As a result of the promotions, dentists appear to be more confused than before.

How a dentist uses a light-curing unit makes a large difference in the amount of energy a restoration receives. Even when the device is handled correctly, if the energy level is insufficient, then the resulting restoration may not attain expected longevity; this may explain why resin-based restorations last only five to seven years when actual life expectancy should be 15 years or more.

In a collection of articles written for ADA Professional Product Review, Jack L. Ferracane, Professor and Chair, Restorative Dentistry Division Director, Biomaterials and Biomechanics, Oregon Health & Science University in Portland, Oregon states that there is “considerable evidence that delivering inadequate energy to the restoration will result in a restoration that has less than optimal properties and poor clinical performance.”

Ferracane goes on to say that light-cured resin-based composite restorations most often need replacing because of secondary caries and restoration fracture. Other reasons include staining, marginal breakdown, wear, a broken tooth or nerve death. Inadequate delivery of light or energy to the restoration can result in the early breakdown of a light-cured restoration. Therefore, a dental curing light must deliver adequate light energy to attain the best physical, chemical, and optical properties of a resin-based composite restoration.

Some of the current high powered lights are recommended to cure a material within one second. These lights put out a tremendous power (4000 mW/cm2) compared to typical lights that emit either 600 or 1200 mW/cm2 and are recommended to cure a material within 20 seconds. The big difference between these high powered units and the typical units is that the material is forced to set all at once with no heat dissipation during the curing time. This amount of heat build up is sufficient to cause skin burns and tissue damage.

What are the Effects of Dental Autoclave

A Packaging cleaned instruments prior to placing them in the sterilizer is a standard of care that protects instruments and maintains their sterility until they are ready for use on a patient. Unprotected instruments may be re-contaminated with dust and spatter or by coming into contact with any number of non-sterile surfaces during transport, storage, tray set-up, and operatory set-up.

Maintain sterilized instruments in the pouches or wrapping in which they were sterilized. If the packaging becomes torn or wet, the items must be repackaged and heat sterilized. Avoid mingling non-sterile packages with sterile ones. There should be a visible indicator, such as chemical indicators or color-change dental autoclave tape on the outside of each package to allow staff to easily discern sterilized instrument packages from those that have not yet been heat-processed.

Dry heat sterilizers have been used effectively in dental office for many years. Just as with any other sterilization method, dry heat sterilization is highly dependent upon the operator following the manufacturer’s instructions for cycle time, temperature, instrument packaging, and loading technique. Because dry air is not as efficient a heat conductor as moist heat at the same temperature, a much higher temperature is required for a dry heat unit to accomplish sterilization.

There have been some recommendations that dry heat be used only in situations where moist heat is not desirable due to the material, such as oils, powders, sharp instruments and glassware. However, the same source points out that dry heat provides excellent penetration and prevents the corrosion of metals. Since forced-air dry heat systems have very short sterilization cycles and are kind to high carbon steel instruments, they are very often used in orthodontic practices to re-process pliers and cutters.

Dental autoclaves are machines that are commonly used during sterilization in dentistry. These machines are usually made from large metal cylinders, and they are similar to pressure cookers. Once the dental equipment are placed in the autoclave, they are sprayed with high-pressure steam. The high pressure inside this machine helps raise the steam to very high temperatures that are necessary for killing disease-causing micro-organisms.

Any tools that can not be subjected to moisture or intense heat must be sterilized with other methods. Chemicals are often used during sterilization in dentistry as well. Some of the chemicals used to kill germs and sterilize dental tools are typically iodine or alcohol based, since both of these chemicals are very effective at killing germs.

Paying Attention on the Use of Dental Air Compressor

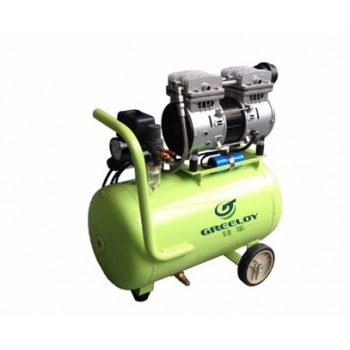
When you’re using a poor-quality air compressor system that delivers either dirty air or an air compressor that delivers air at a lower pressure than required, you’ll see low-quality or even no operation of these devices. If air pressure is good, but the air itself is unclean, then you’re risking internal damage to those units, reducing their overall lifespan.

The biggest concern is moist air that can harm delicate internal machinery and quickly make your tools unusable. Moisture can lead to corrosion, microorganism contamination and decrease the precision of your tools. For those who select a low-quality air compressor, a common issue is carbon buildup that poses an even greater danger to the machinery in handpieces.

Electric dental handpieces also tend to have a greater cost and a higher number of parts that you’ll need to maintain, while air-driven pieces can be obtained in full, often for less than $1,000. Air-driven handpieces also tend to be lighter and easier to handle, with the latest innovations providing greater torque so you can use them for many applications over a longer period of time.

Oil-lubricated air compressors tend to be quieter and can last longer than other models, making them seem like a top choice for a dental office, but that may not be the case.

The main reason many dentists choose an oilless air compressor is because they have a lower risk of contaminating the compressed air with lubricant. These units also tend to be lighter, allowing them to be placed in a wider range of areas, while still creating as much air flow and pressure as many oil-lubricated models.

Removing the risk of contaminating the air is the biggest win and makes the most sense because it can protect the health and safety of your patients, staff and those in your office waiting areas. While you will need to perform maintenance slightly more often, the health and safety concerns significantly outweigh any benefit you’d see from using the heavier, lubricated models.

Choosing Right X-ray Machine for Your Dental Practice

If you’re a dentist in 2016, you already know that investing in the right kind of digital image equipment is half the battle. In dentistry, there are two types of digital imaging systems used in intraoral radiography: computed radiography (CR) and direct radiography (DR). These are then categorized into periapical and panoramic x ray machines.

Dental radiography has evolved from film and chemical developers into a highly technical process that involves various types of dental x-ray machines, as well as powerful dental software programs to assist the dentist with image acquisition and diagnostic analysis of the acquired images. When making the decision to purchase x-ray equipment, the doctor needs to research the available options thoroughly, in order to make an informed choice for the “right” machine for his or her practice.

One type of portable dental x-ray is small, light, cordless and hand-held and can travel almost anywhere considering its compact size. This type of machine is an option for almost every patient, however, it’s especially useful for occasionally restless patients, such as young children, who require constant supervision and a quick x-ray. It can also be a better option to use in small spaces. The device works on battery so it’s important to have extras on hand in addition to a fully charged battery upon arrival regardless of where the patients are.

The other type of portable dental x-ray is one that uses a power cord and is slightly larger and heavier than the hand-held device; it’s also typically more durable. Each comes with a stand, which some dentists might find to be more comfortable and easier to use than a hand-held device. Some may also be able to operate as a hand-held device when using a stand isn’t necessary. This type is a good option for dentists who prefer to have the features of each type.

The first question that a doctor should ask themselves is, “What is the main type of treatment that I provide my patients?” If you are a general practitioner, a standard 2D panorex will provide all of the imaging requirements needed for such treatments as caries detection, diagnosis of TMJ issues, OPG images, and images of the patients entire detention in a single x-ray. Many of the newer 2D panoramic units also offer extraoral bitewing imaging capability, which allows the dentist to obtain a bitewing image without putting a sensor or periapical film inside of the patient’s mouth.

If the practice is concentrated in endodontic( Dental endo motor ) and implant treatment, then a CBCT machine is the most practical method of providing the doctor with diagnostic tools such as mandibular canal location, surgical guides, and pre-surgical treatment planning with the assistance of powerful 3D dental software applications. The patient is benefited by the reduced radiation exposure provided by these machines.

The Uses of Dental Intraoral Camera

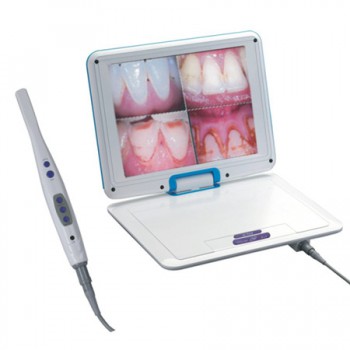
An intraoral camera is a camera which is designed to be used in the mouth for the purpose of taking video or still photography. Sometimes it is difficult for patients to fully understand the condition of their teeth in the same way the dentist does – using an intraoral camera is a state of the art dental technical device that really helps you see for yourself exactly what is happening in your mouth.

These cameras are most commonly used in dental offices, although patients can also use them at home to monitor dental health or to satisfy curiosity about what the inside of the mouth looks like. Several firms specialize in producing intraoral cameras and accessories, and others make adapters which can be used with conventional cameras so that they can be used in the mouth.

Images taken by an intraoral camera can also be reviewed later, which can be useful for a dentist who feels a nagging suspicion that something is not quite right in the mouth of a patient. The intraoral camera can also be used to document procedures for legal and educational reasons, and to create projections of a patient’s mouth which can be used in medical schools for the purpose of educating future dentists about various issues which pertain to oral health.

The intraoral camera enlarges the inside of the teeth to more than 40 times their actual size on a full color screen display. By zooming in on problem areas in affecting the teeth, dentists are capable of seeing much more than they could with the human eye alone. Often, dentists find the beginnings of periodontal disease or tooth decay that would have otherwise gone undetected if examined without the intraoral camera.

The intraoral camera is not just a diagnostic tool, but it also serves as an educational one too. In the past, dentists have struggled to explain dental decay and other health problems to patients. Most people cannot see well into their own mouths, which leaves dentists to drawing diagrams or using props to attempt to explain what is going on in the mouth of their patients.

The intraoral cameras designed for use in dental facilities come with disposable probes or probe covers to ensure that germs are not passed between patients, and they may come with a variety of options which enhance the functionality of the camera. Versions designed for home use are usually much more basic, but they can still be useful for people who want to see the inside of the mouth. Using a camera at home, someone can identify an issue which requires a dentist’s attention, keep an eye on a recovering surgical site, or teach children about the importance of oral hygiene.

The Suggestions about Buying Dental Equipment

Dental equipment are very expensive. How can we spend it value for money? Purchasing portable dental equipment for your practice can also be difficult. On average, a new dental practice will spend around $500,000 on structural upfit, equipment and supplies for their business. To make sure you are getting the most for your money, consider the following tips before diving into the world of dental equipment sales.

With so many different models and manufacturers to choose from, you want to make sure you’re investing in something of quality that is best for your practice. While some products may do the same function, some perform and last better than others simply because of how they were made.

Although “top of the line” dental chairs may cost between $7,000 to $9,000, you may benefit more from buying a used portable folding chair instead. This is because many used and portable dental chairs are made of more durable materials than many of the mass-produced products on the market now.

Before making any final decisions and purchasing dental equipment for sale, do as much research as possible on your own first. Doing so will help you understand all that the market has to offer and what your options are.

It is never a good rule of thumb to buy something simply because it is available or because it is affordable for you. Find out exactly what your practice needs and then begin your research on the quality products to invest in. This is because buying portable dental equipment is just that, an investment. Check the product’s features and confirm how it will make your practice more effective.

One of the best ways to make sure you are buying quality materials is to ask other professionals within your practice. This can come from directly contacting them or simply reading reviews from others in the industry. Make sure that the individuals you are getting advice from are also established and reputable, just as you would with choosing a manufacturer.

Those with years of experience will be able to tell you which products are best and which are not. In many cases, they have already used the product and have the best knowledge of whether it is a good investment and the pros and cons of the products.

What Should You Know of Dental Curing Light

In the dental field, a dental curing light can use ultraviolet or visible light, depending on what it is designed for. Both dentist and patient need to wear eye protection to limit damage to the retina for even the 20 seconds to a minute that the light is in use during rapid curing, and the light needs to be well maintained so that it will work properly and effectively. It’s also important to use the right curing light for the right resin product; many lights are designed to handle a range of resins safety.

Using a curing light accomplishes two things. In the first place, it makes sure that the resin cures properly and adheres evenly. When applying fillings, this is critical to keep the filling in place in the mouth. For sealants, the curing light limits the risk of cracks and other problems with the sealant. With adhesives for implants and braces, the rapid, even cure is also designed to limit problems in the future.

The dental curing light also increases patient comfort by rapidly curing resins so that the patient is not forced to sit in discomfort while the resin sets. Since the mouth usually needs to be held open wide and may be dry for the procedure, patients usually want the procedure to end as quickly as possible so that they can close their mouths and remoisturize the dried oral membranes. Using a curing light gets patients in and out of the chair quickly so that the experience of irritation and pain is limited.

The selection of a curing light that fits your style of practicing remains one of the most important dental equipment purchases you will make. If you have an active restorative practice, it is a device that you use virtually every time you treat a patient. The right light can help you achieve success, while the converse is true – the wrong light can make your efforts more tedious and your results less consistent.

Curing lights allow us to initiate the polymerization reaction “on demand” for a vast array of materials. However, there is, perhaps, more misinformation and hype regarding this type of equipment compared to just about anything else we use on a daily basis. Most of these controversies center on how long you have to cure specific types of restorations as well as how deep you can cure specific types of materials.

Manufacturers continue to make outlandish claims of their curing capabilities, most of which fall into the “too good to be true” category. An example is the claim that a new light can accomplish a “5mm depth of cure in 3 seconds”. Please don’t be fooled by these ads – you absolutely, positively cannot cure a composite in three seconds. If you undercure a restoration, for example, you may not even be aware of the negative sequelae for years. Therefore, selecting a curing light and using it properly can greatly affect the performance and longevity of your restorations.