The Advantages of LED Dental Curing Light

Dental curing lights allow us to initiate the polymerization reaction “on demand” for a vast array of materials. However, there is, perhaps, more misinformation and hype regarding this type of equipment compared to just about anything else we use on a daily basis. Most of these controversies center on how long you have to cure specific types of restorations as well as how deep you can cure specific types of materials.

Manufacturers continue to make outlandish claims of their curing capabilities, most of which fall into the “too good to be true” category. An example is the claim that a new light can accomplish a “5mm depth of cure in 3 seconds”. Please don’t be fooled by these ads – you absolutely, positively cannot cure a composite in three seconds.

There is the issue of LEDs not being able to cure all materials. There is no doubt that the vast majority of light-cured materials can be fully polymerized with an LED. However, the few materials that cannot be cured with an LED mandate that you still have a halogen around for these contingencies. This may be just a nuisance as long as you know which material falls into this category, but it won’t compromise patient care. But what if you don’t know that a material can’t be cured properly with an LED? More than likely, it will still get pretty hard, but its degree of cure will be compromised along with its long-term performance.

The obvious solution to this problem is to buy an LED light that is capable of curing all materials. Unfortunately, only a few of them have this capability and it may require using a special tip. Therefore, it is still somewhat of a guessing game and you just have to hope that you don’t guess wrong.

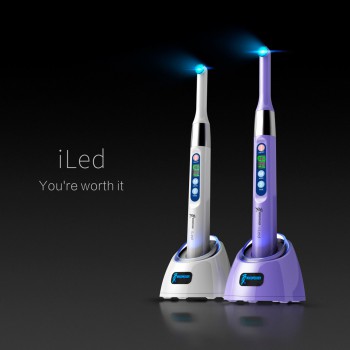
This brings us back to halogen lights, which have something that it will take LEDs a long time to duplicate: a solid track record. Introduced just about 25 years ago, halogen lights have been the mainstay for curing resin-based materials. What you see is what you get – without any unpleasant surprises. And while many lights along the way have been introduced with various bells and whistles to make them stand out from the crowd, probably the only relatively new design is possessed by the Swiss Master, with its water cooling and monster light bulb. But with a price tag at the top of the food chain, it is clearly not for everyone.

The Sterilization Methods in Dentistry

Since many germs can be transferred simply by touching contaminated surfaces, dentists and dental assistants are typically very fastidious about disinfecting the surfaces in their offices and treatment rooms. Solid surfaces, such as counters and sinks, are generally wiped down with antibacterial spray. Portable folding chairs are also usually covered with disposable paper covers that are discarded after each patient. Dentists and their assistants also usually wear protective barriers, such as gloves and face masks, to help prevent spreading germs to their patients.

Disposable dental tools and supplies are some of the most important items when it comes to sterilization in dentistry. Some disposable dental supplies include bibs and masks wrapped in sterile packaging. Once these are used with one patient, they are simply thrown away.

Tools that can’t be thrown away, such as dental drills, are generally put through a very intensive dental sterilization process. First they are usually vigorously scrubbed by hand. This is usually done with hot water and detergent, and it helps remove any large particles, such as plaque. They may also be placed in a vibrating tray filled with cleaning solution, which can help remove very small particles.

Maintain sterilized instruments in the pouches or wrapping in which they were sterilized. If the packaging becomes torn or wet, the items must be repackaged and heat sterilized. Avoid mingling non-sterile packages with sterile ones. There should be a visible indicator, such as chemical indicators or color-change autoclave tape on the outside of each package to allow staff to easily discern sterilized instrument packages from those that have not yet been heat-processed.

Dry heat sterilizers have been used effectively in dental office for many years. Just as with any other sterilization method, dry heat sterilization is highly dependent upon the operator following the manufacturer’s instructions for cycle time, temperature, instrument packaging, and loading technique. Because dry air is not as efficient a heat conductor as moist heat at the same temperature, a much higher temperature is required for a dry heat unit to accomplish sterilization.

Sterilization in dentistry is very important, and dentists and dental assistants typically clean and disinfect most surfaces in a their offices and treatment rooms to help prevent the spread of germs. Disposable dental supplies are also used whenever possible. Tools that are not disposable are generally scrubbed by hand and placed in a machine known as a dental autoclave. This machine then disinfects the tools by spraying them with very high-pressure steam, which kills most micro-organisms. Any tools that can not be subjected to high heat or moisture are usually disinfected with chemicals.

The Effectiveness and Efficiency of Dental Air Polisher

Dental air polisher has been compared to scaling and rubber-cup polishing for efficiency and effectiveness of stain and plaque removal. The literature overwhelmingly supports the use of the air polisher as an efficient and effective means of removing extrinsic stain and plaque from tooth surfaces. Air polishing requires less time than traditional polishing methods and removes stain three times as fast as scaling with comers. In addition, less fatigue to the operator has been mentioned as an important benefit of air polishing.

Most investigators agree that intact enamel surfaces are not damaged when stain removal is accomplished with an air polisher. Even after exposure to enamel for the equivalent of a 15-year recall program, surfaces were not altered.

Still, researchers and manufacturers caution against prolonged use of the air polisher on cementum and dentin. When moderate to heavy stain is present on root surfaces, dental hygienists are often faced with the problem of removing it with the least alteration of cementum. One choice is to leave the stain and explain to the patient that stain is not associated with oral disease and will not harm the teeth or gingiva since it is only a cosmetic concern. To many patients, this is not a viable choice since appearance is considered so important in today’s society.

Other choices include removing the stain with a rubber cup polisher and prophylaxis paste; sonic, ultrasonic scalers; Dental Hand Instruments or the air polisher. Wilkins recommends removing as much stain as possible during root planing with curets. However, in one in-vitro study, air polishing was shown to remove less root structure than a curet in simulated three-month recalls for three years. Woodall agrees that the air polisher may be preferable to curets in this situation. Since less root structure is removed, decreased root-surface sensitivity also may be a benefit.

Clinical studies to evaluate soft tissue usually provide generalizable conclusions. Gingival bleeding and abrasion are the most common effects of air polishing. These effects are temporary; healing occurs quickly and effects are not clinically significant. No complications were seen with healing at extraction sites following air polishing of teeth prior to extraction. To avoid tissue trauma, the manufacturer recommends pointing the tip of the air polisher at the facial, lingual, or occlusal surfaces, thus avoiding the gingival margins.

Effects of air polishing on gold foil, gold castings, porcelain, amalgam, and glass ionomers have been studied. Air polishing of amalgam alloys and other metal restorations has produced a variety of effects, including matte finishes, surface roughness, morphological changes, and structural alterations. One study found no detrimental changes to the marginal integrity of amalgams. Surface roughness, staining, pitting, and loss of marginal integrity were seen on porcelain surfaces. One study reported only minimal changes in porcelain and gold alloys. Hand instrumentation at the gingival margins and caution were recommended when working around these restorations. The surface roughness of glass ionomers increased following either air polishing or rubber-cup polishing. Until research findings on air polishing’s effect on these restorative materials are unequivocal, clinicians should follow manufacturer recommendations to “avoid prolonged or excessive use on restorative dental materials.

The Different Choices for Dental Curing Light

There are numerous manufacturers in providing some type of hardness disc to verify that a dental curing light will polymerize a specific thickness of composite in a specified amount of time. Most of these discs have a small hole in the center. For this test, you fill the hole in the disc with the composite, cure it for a specified time period, and then turn over the disk to check whether the bottom surface of the cured composite “feels” like the disc when scratched with an explorer or other sharp instrument. If it does, then this presumably indicates the composite is adequately cured for intraoral( intraoral camera ) use.

However, this is a dangerous test that could give you false and misleading information. Consider what we found with the Demetron Hardness Tester, which is essentially a round white plastic disc with three holes. We filled the three holes in the disc with our test composite and cured each composite specimen 5 seconds, 10 seconds, or 40 seconds. We then turned over the disk and tested the bottom of each cured composite disc as well as the Hardness Tester itself for Knoop hardness. Finally, we asked three of our research staff to scratch the bottoms of the specimens with a sharp explorer and compare the “feel” to that of the Hardness Tester.

Measure the power baseline for your light when it is new using a radiometer and remeasure it on a weekly basis. For halogen types, if there is a significant decrease in output, change the bulb. If that doesn’t help, try a different curing tip. If it still does not register an adequate reading, try cleaning the tip and filter with a kit designed for that purpose. If all your remedies are not successful, you should send the light back to the manufacturer for a check-up.

Even with this testing, it is prudent to send your lights back to the manufacturer at specific intervals, such as every 24 months or after five bulb changes (if halogen), whichever comes first. This type of maintenance will keep your curing light in top condition and allow it to deliver maximum power.

Many directions include some strange safety measures such as using the light for 20 seconds and letting it rest for 60 seconds. Another one tells you not to use the light if the patient is on N2O/O2. These stipulations are mandated by various government regulations and manufacturers must comply if they want to sell the product internationally. Don’t let these warnings stop you from using the lights in a normal manner.

On the other hand, with LEDs that do not have fans, you are typically advised to limit their continuous use to several minutes and then allow them to cool off. While we have subjected these lights to extended curing tests and many of them have passed these tests, it is probably prudent to heed this type of warning and not subject the equipment to heat challenges that can shorten their useful lives.

Different Types of Dental Compressor Filter

Dental air compressors are devices that draw atmospheric air into a compression head where it is pressurized and stored in a tank or reservoir for later use. Common uses of the compressed air include driving pneumatic tools, spray painting, or sand blasting. Unfortunately, compressors draw all contaminants present in the air into the system as well. An accumulation of condensation is also an unavoidable by-product of the air compression cycle. Lubricating oil from the compressor head also finds its way into the stored air and, along with dust and moisture, can play havoc with sensitive tools, hoses, or sprayed paint.

Compressor filters are devices used on air compressors to filter dirt particles from the intake air supply, to remove contaminants from the compressor lubricating oil, and to trap moisture in the compressed output air flow. Intake air and oil filters generally feature cassette-type inserts made of cellulose, felted material or woven fabrics. Water filters generally consist of a glass bowl and filter element that separate condensate from the compressed air. The bowls have a drain cock on the bottom to periodically remove all of the trapped water. Compressors of all types benefit significantly from the inclusion of all compressor filter types, and, consequently, a regular inspection of these elements will ensure the longevity of the compressor and the integrity of the compressed air supply.

The most effective way of removing a significant volume of these contaminants is the use of a compressor filter. These devices fall into three basic categories that address all of the common contaminant issues experienced with compressed air systems. The first of these categories are the family of intake air filters. Typically consisting of a cassette type insert in a closed cylinder, these devices are placed in the compressor’s intake air line, where they remove most airborne dust particles. These filter elements are generally made of woven fabrics, cellulose fiber, or felted materials.

The second type of compressor filter is the moisture filter or trap. These filters consist of a filter element in a glass bowl. The structure of the filter causes a cyclonic internal flow pattern, which separates most of the condensate from the compressor’s output air. The water collects in the bowl where it is later drained using a small valve on its bottom section. Combination compressor filter models that remove leached lubrication oil and water are also available.

The last type of compressor filter is a standard oil filter that ensures the compressor’s lubrication oil is kept free of contaminants. These are also cassette-type filters that have specialized core elements similar to an automobile oil filter. The longevity of the compressor mechanism, hoses, and all of the equipment that it drives, as well as the quality of spray paint jobs completed with compressed air, can be enhanced considerably by having these filters in place. For this reason, these filters should be inspected regularly and replaced immediately if worn or defective.

The Recent Information about Dental Curing Light

Today, almost all resin composites, dental adhesives and adhesive cements utilize light energy for complete polymerization, which further determines the long-term clinical success of a procedure. While much attention has been given to the details of diagnosis, preparation and the development of improved adhesives and resins, light curing is often taken for granted.

Using a curing light accomplishes two things. In the first place, it makes sure that the resin cures properly and adheres evenly. When applying fillings, this is critical to keep the filling in place in the mouth. For sealants, the curing light limits the risk of cracks and other problems with the sealant. With adhesives for implants and braces, the rapid, even cure is also designed to limit problems in the future.

The dental curing light also increases patient comfort by rapidly curing resins so that the patient is not forced to sit in discomfort while the resin sets. Since the mouth usually needs to be held open wide and may be dry for the procedure, patients usually want the procedure to end as quickly as possible so that they can close their mouths and remoisturize the dried oral membranes. Using a curing light gets patients in and out of the chair quickly so that the experience of irritation and pain is limited.

There have been significant improvements in the curing light technology in recent years. Today, dental manufacturers can develops variety of curing lights, from plasma arc to argon laser curing lights. That said, two curing lights commonly used in the dental operatory are Quartz Tungsten Halogen (QTH) lights and Light-emitting diode (LED) lights.

Quartz Tungsten Halogen (QTH) lights. These lights have a quartz bulb with a tungsten filament that irradiate both UV and white light, which must be filtered to remove heat and all wavelengths except those in the violet-blue range. The lights have broad emission spectrum of approximately 390 nm to 500 nm, which is capable of curing all composites.

Curing lights vary according to their features; power intensities and energy delivered to the tooth; timing for use; availability of accessories; configuration of curing probes/tips available for a device; and price. The ideal light-curing unit features a broad-emission spectrum, sufficient light intensity, minimal drop off of energy with distance (collimated beam), a large emission window of light probe, ease of use and easy maintenance.

The Economics of Owning a Compressed Air System

Compressed air systems form the backbone of industrial manufacturing, are an essential component of medical facilities and are even responsible for keeping commercial food services running. Needless to say, many of the things that Americans have come to take for granted are only possible with the assistance of compressed air.

Compressed air systems provide consistent, responsive power to end-use applications. This power is essential for production plant operations who are looking to keep their employees productive while ensuring that they can complete operations safely and efficiently.

In many ways, the question of whether to replace or repair a compressed air system can be expressed as a mathematical problem. In other words, at which point does the money saved from a new system offset the cost of its purchase?

Luckily, many people have crunched the numbers on this question and have provided a nice basic framework for deciding which approach makes the most sense for your business.

According to PneumaticTips, it’s important to remember that, if you consider the overall cost of ownership of a compressed air system, assuming a ten-year life for the system, the purchase cost only accounts for about 12% of the total. Furthermore, 76% of the cost of owning a compressed air system comes in the form of electricity bills.
To put this in perspective, if you continuously run a 100-hp compressor at full power, you will spend $74,000 a year in energy costs, assuming a rate of 10 cents per kWh.

Therefore, if you are assessing the value of your compressed air system and making your decision in purely economic terms, you need to keep the total cost of ownership in the forefront of your mind. While the cost of repairs may be significantly less than the cost of replacing your system, ask yourself if you’re keeping a system working that’s actually costing you more in the long run by operating less efficiently.

These costs come in many different forms. First, as compressors age, the costs of repairs increase. That’s why you should carefully consider any repair that costs over 50% of the cost of a comparable replacement. But you also need to consider the operational inefficiencies and the subsequent costs of an older dental air compressor. Because of how inefficient some older models are, you may be wasting as much money on energy costs as you would spend on a new compressor.

The General Uses of Dental Air Polisher

Air polishing units typically generate a stream of pressurized air, carrying specially graded particles of a mild soluble abrasive, such as sodium bicarbonate. The abrasive is directed, in the presence of a stream of water, at a tooth surface to be cleaned. The mixture of water and powderladed stream occurs on the tooth surface and forms a “slurry” that is responsible for the cleaning action.

More recent technology produces a slurry by introducing the water stream into the powder-laden air stream, within the spray head at a critical moment, to produce a fully homogeneous stream that is emitted from a single nozzle. This stream technology configuration has not only been shown to prevent nozzle clogging by preventing the buildup of deposits, but also results in a much more efficient cleaning action because the slurry is formed prior to emission.

Air polishing devices were originally designed to be standalone tabletop units. They have been considered to be the equipment of choice for the hygiene department, sometimes being combined with ultrasonic scaler. They offer a large powder chamber holding enough powder for multiple treatments, along with the convenience of a lightweight, fully autoclavable handpiece design. They are activated by a dedicated foot control that can select either a polishing or rinse mode and they require connections to water, air and electrical outlets. As such, they are normally allocated to a particular treatment room.

Three safety concerns regarding use of the dental air polisher appear in the dental literature including that of the patient, the operator, and others in the treatment room. Patient concerns include systemic problems from absorption of the sodium bicarbonate polishing powder, respiratory difficulties from inhaling aerosols that contain oral microorganisms, stinging of the lips from the concentrated spray, and eye problems from the spray entering the patient’s eyes, especially if contact lenses are worn. Some of these problems could be addressed by coating a patient’s lips with a protective lubricant, using the appropriate technique, removing contact lenses, wearing safety glasses, and placing a protective drape over the patient’s nose and eyes.

Effects of air polishing on gold foil, gold castings, porcelain, amalgam, and glass ionomers have been studied. Air polishing of amalgam alloys and other metal restorations has produced a variety of effects, including matte finishes, surface roughness, morphological changes, and structural alterations. One study found no detrimental changes to the marginal integrity of amalgams. Surface roughness, staining, pitting, and loss of marginal integrity were seen on porcelain surfaces.