Category Archives: Dental Curing Light

The Thing You Should Know about Dental UV Curing Light

UV Curing is defined as ‘a speed curing process in which high intensity ultraviolet light is used to create a photochemical reaction that instantly cures inks, adhesives, coatings and other materials’.

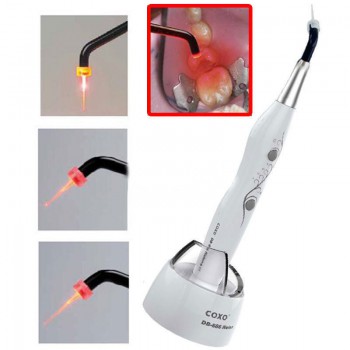
The use of a Liquid light guide, for example, is the most economical way of delivering high intensity UV light to materials. Light guides come in two, three or four pole configuration and filter mount assemblies are available to prolong their shelf life.

A radiometer is a useful tool to have in the UV Curing process since they allow operators to monitor and record the UV light curing process – for example a low UV intensity measurement would indicate to the user that part of the apparatus needs to be replaced. Radiometers also have the capability to confirm if the operator is sufficiently shielded from the UV light.

Conventional radiometers often allow a limited check of the light intensity of the curing device only. The reason for this are diverse technical limitations, such as the strictly defined diameter of the light measuring cell. As a rule, only approximate values are measured for each type of device (halogen, plasma, LED etc.). Owing to this fact, conventional radiometers can only be used for a relative light measurement or for checking the consistency of the light intensity.

Light polymerization is regarded as the no. 1 source of error when processing light-curing dental materials. Therefore, you should exercise extreme care in order to save time and not to jeopardize the success of the treatment.
We have compiled a quick guide for you to download. Here you will find essential tips on how to achieve optimum polymerization results.
Here are a few excerpts:

Check the light intensity of your dental curing light regularly and document the result.
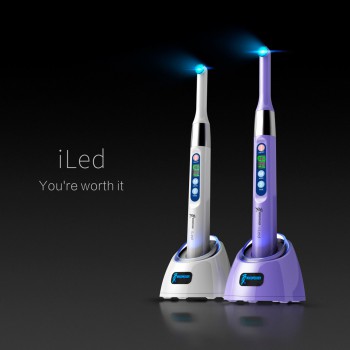
Check and clean the curing light before use.
Observe the light curing times and material thickness information from the composite manufacturer.
Use a light guide which gives a uniform distribution of the light output across the light tip.
Position the light tip as closely as possible to the composite and secure it so that the curing light device does not slip.

Other accessories have been designed to offer protection from UV and visible light. Shields and stands offer protection from UV and visible light, whilst providing the user with clear visibility of the curing parts. Protective eye goggles are also recommended to provide additional protection from UV light exposure.

The Advantages of Dental Curing Light

In the dental field, a curing light can use ultraviolet or visible light, depending on what it is designed for. Both dentist and patient need to wear eye protection to limit damage to the retina for even the 20 seconds to a minute that the light is in use during rapid curing, and the light needs to be well maintained so that it will work properly and effectively. It’s also important to use the right curing light for the right resin product; many lights are designed to handle a range of resins safety.

Both light intensity – or irradiance – and the dental application should factor into a dentist’s decision regarding his or her choice of curing light. For instance, irradiance is measured by calculating power output, or milliwatts (mW), of a curing light across the surface area of the curing light guide. A curing light must deliver a minimum irradiance of 400mW/cm2 for a time interval to adequately polymerize a 1.5-2mm thick resin composite.

Clinicians also should consider the clinical application at hand. It has been documented that irradiance of curing lights attenuate/decrease significantly when it passes through restorative materials, such as ceramic restorations or resin composites. The percentage of decrease in irradiance depends on filler type, filler loading, shades, refractive index, opacity, translucency and thickness of restorative materials. Curing lights with high irradiance compensate for the decrease in the loss of total energy and allow dentists to cure resin composites completely. In general, an irradiance of 1000mW/cm2 or higher is considered ideal to cure resin-based materials through indirect restorations.

Using a curing light accomplishes two things. In the first place, it makes sure that the resin cures properly and adheres evenly. When applying fillings, this is critical to keep the filling in place in the mouth. For sealants, the curing light limits the risk of cracks and other problems with the sealant. With adhesives for implants and braces, the rapid, even cure is also designed to limit problems in the future.

The dental curing light also increases patient comfort by rapidly curing resins so that the patient is not forced to sit in discomfort while the resin sets. Since the mouth usually needs to be held open wide and may be dry for the procedure, patients usually want the procedure to end as quickly as possible so that they can close their mouths and remoisturize the dried oral membranes. Using a curing light gets patients in and out of the chair quickly so that the experience of irritation and pain is limited.

The Advantages of LED Dental Curing Light

Dental curing lights allow us to initiate the polymerization reaction “on demand” for a vast array of materials. However, there is, perhaps, more misinformation and hype regarding this type of equipment compared to just about anything else we use on a daily basis. Most of these controversies center on how long you have to cure specific types of restorations as well as how deep you can cure specific types of materials.

Manufacturers continue to make outlandish claims of their curing capabilities, most of which fall into the “too good to be true” category. An example is the claim that a new light can accomplish a “5mm depth of cure in 3 seconds”. Please don’t be fooled by these ads – you absolutely, positively cannot cure a composite in three seconds.

There is the issue of LEDs not being able to cure all materials. There is no doubt that the vast majority of light-cured materials can be fully polymerized with an LED. However, the few materials that cannot be cured with an LED mandate that you still have a halogen around for these contingencies. This may be just a nuisance as long as you know which material falls into this category, but it won’t compromise patient care. But what if you don’t know that a material can’t be cured properly with an LED? More than likely, it will still get pretty hard, but its degree of cure will be compromised along with its long-term performance.

The obvious solution to this problem is to buy an LED light that is capable of curing all materials. Unfortunately, only a few of them have this capability and it may require using a special tip. Therefore, it is still somewhat of a guessing game and you just have to hope that you don’t guess wrong.

This brings us back to halogen lights, which have something that it will take LEDs a long time to duplicate: a solid track record. Introduced just about 25 years ago, halogen lights have been the mainstay for curing resin-based materials. What you see is what you get – without any unpleasant surprises. And while many lights along the way have been introduced with various bells and whistles to make them stand out from the crowd, probably the only relatively new design is possessed by the Swiss Master, with its water cooling and monster light bulb. But with a price tag at the top of the food chain, it is clearly not for everyone.

The Different Choices for Dental Curing Light

There are numerous manufacturers in providing some type of hardness disc to verify that a dental curing light will polymerize a specific thickness of composite in a specified amount of time. Most of these discs have a small hole in the center. For this test, you fill the hole in the disc with the composite, cure it for a specified time period, and then turn over the disk to check whether the bottom surface of the cured composite “feels” like the disc when scratched with an explorer or other sharp instrument. If it does, then this presumably indicates the composite is adequately cured for intraoral( intraoral camera ) use.

However, this is a dangerous test that could give you false and misleading information. Consider what we found with the Demetron Hardness Tester, which is essentially a round white plastic disc with three holes. We filled the three holes in the disc with our test composite and cured each composite specimen 5 seconds, 10 seconds, or 40 seconds. We then turned over the disk and tested the bottom of each cured composite disc as well as the Hardness Tester itself for Knoop hardness. Finally, we asked three of our research staff to scratch the bottoms of the specimens with a sharp explorer and compare the “feel” to that of the Hardness Tester.

Measure the power baseline for your light when it is new using a radiometer and remeasure it on a weekly basis. For halogen types, if there is a significant decrease in output, change the bulb. If that doesn’t help, try a different curing tip. If it still does not register an adequate reading, try cleaning the tip and filter with a kit designed for that purpose. If all your remedies are not successful, you should send the light back to the manufacturer for a check-up.

Even with this testing, it is prudent to send your lights back to the manufacturer at specific intervals, such as every 24 months or after five bulb changes (if halogen), whichever comes first. This type of maintenance will keep your curing light in top condition and allow it to deliver maximum power.

Many directions include some strange safety measures such as using the light for 20 seconds and letting it rest for 60 seconds. Another one tells you not to use the light if the patient is on N2O/O2. These stipulations are mandated by various government regulations and manufacturers must comply if they want to sell the product internationally. Don’t let these warnings stop you from using the lights in a normal manner.

On the other hand, with LEDs that do not have fans, you are typically advised to limit their continuous use to several minutes and then allow them to cool off. While we have subjected these lights to extended curing tests and many of them have passed these tests, it is probably prudent to heed this type of warning and not subject the equipment to heat challenges that can shorten their useful lives.

The Recent Information about Dental Curing Light

Today, almost all resin composites, dental adhesives and adhesive cements utilize light energy for complete polymerization, which further determines the long-term clinical success of a procedure. While much attention has been given to the details of diagnosis, preparation and the development of improved adhesives and resins, light curing is often taken for granted.

Using a curing light accomplishes two things. In the first place, it makes sure that the resin cures properly and adheres evenly. When applying fillings, this is critical to keep the filling in place in the mouth. For sealants, the curing light limits the risk of cracks and other problems with the sealant. With adhesives for implants and braces, the rapid, even cure is also designed to limit problems in the future.

The dental curing light also increases patient comfort by rapidly curing resins so that the patient is not forced to sit in discomfort while the resin sets. Since the mouth usually needs to be held open wide and may be dry for the procedure, patients usually want the procedure to end as quickly as possible so that they can close their mouths and remoisturize the dried oral membranes. Using a curing light gets patients in and out of the chair quickly so that the experience of irritation and pain is limited.

There have been significant improvements in the curing light technology in recent years. Today, dental manufacturers can develops variety of curing lights, from plasma arc to argon laser curing lights. That said, two curing lights commonly used in the dental operatory are Quartz Tungsten Halogen (QTH) lights and Light-emitting diode (LED) lights.

Quartz Tungsten Halogen (QTH) lights. These lights have a quartz bulb with a tungsten filament that irradiate both UV and white light, which must be filtered to remove heat and all wavelengths except those in the violet-blue range. The lights have broad emission spectrum of approximately 390 nm to 500 nm, which is capable of curing all composites.

Curing lights vary according to their features; power intensities and energy delivered to the tooth; timing for use; availability of accessories; configuration of curing probes/tips available for a device; and price. The ideal light-curing unit features a broad-emission spectrum, sufficient light intensity, minimal drop off of energy with distance (collimated beam), a large emission window of light probe, ease of use and easy maintenance.